

I hope you enjoyed my previous post, Sketch Series No 1. Now, let’s try the next four sketches! You can find these sketches on page 22 of the Stampin’ Up! 2024 Annual Catalog and follow along below.

Materials Used
I was much more intentional about using a small set of products and the simplest techniques this time. However, I must confess: I used a retired DSP set. <face palm!> Next time, I’ll use all current products. I promise!
- Primary Colors: Crushed Curry, Lost Lagoon, Petal Pink, Pool Party
- DSP: Sunny Days (retired)
- Card Stock: Lost Lagoon, Pool Party
- Primary Stamp Sets: Happy Little Labels, Happy Labels
Detailed Instructions
Here are all the steps I took making these four sketches. As usual, you can jump straight to the list of materials and measurements here: Measurements and Supplies
Before diving in, please note: All cards in this series use an 8 1/2″ x 5 1/2″ Basic White thick cardstock base scored at 4 1/4″. Since the card base is white, I did not use inserts.
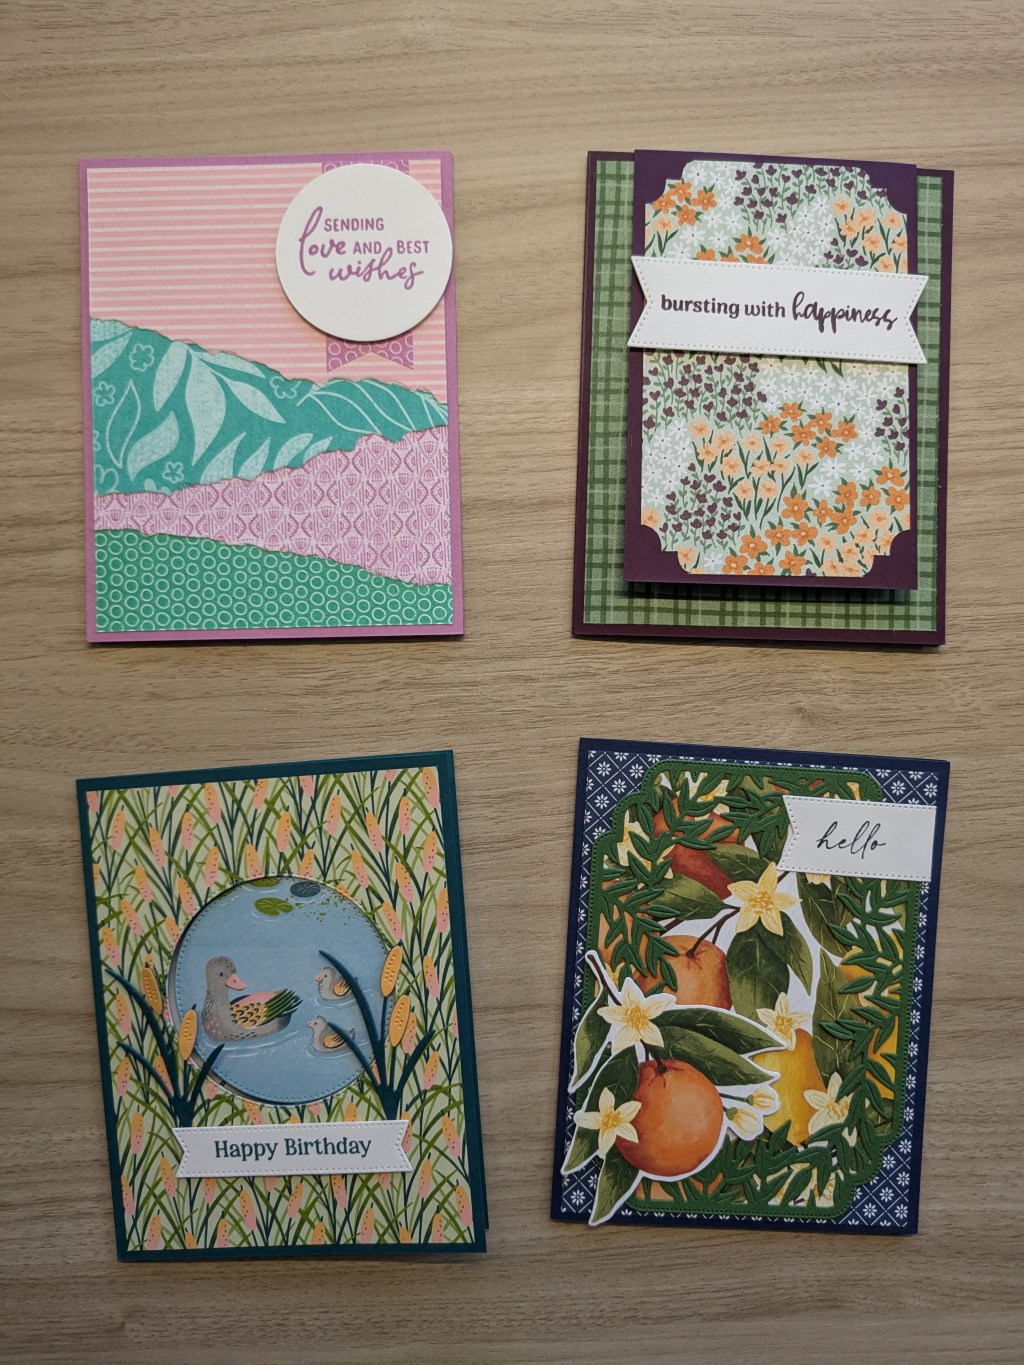
Hello
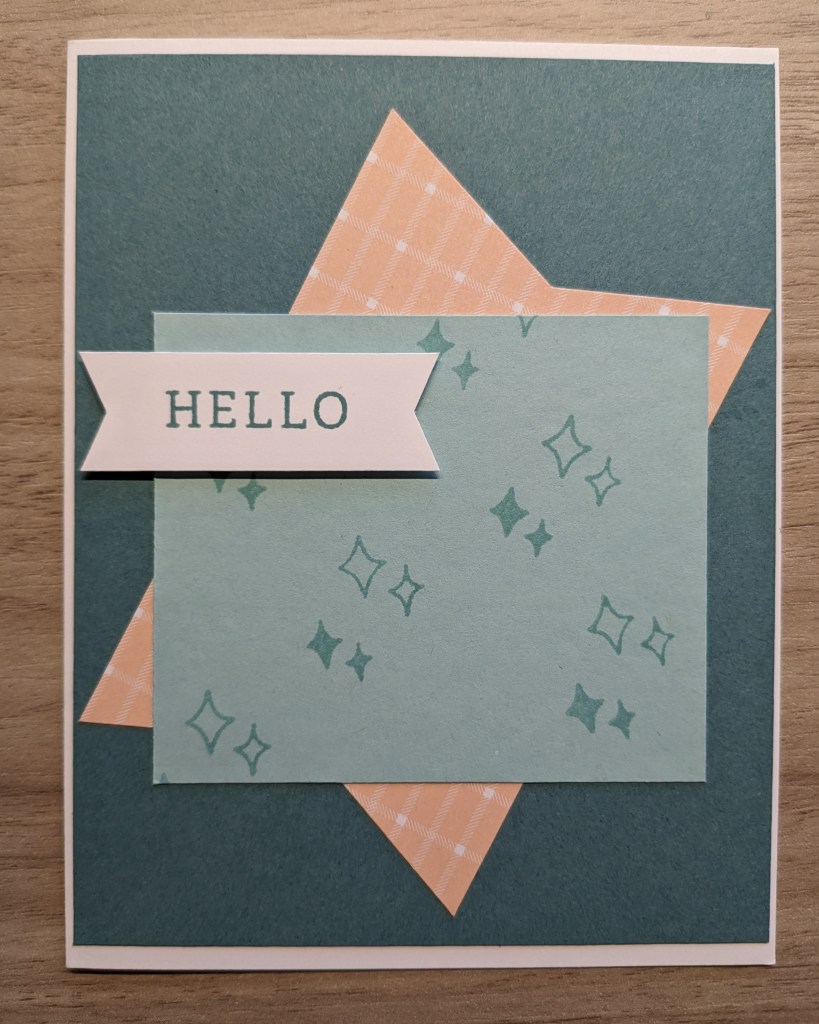
I chose Lost Lagoon and the Sunny Day DSP as my foundation for these designs, so I started with a 4″ x 5 1/4″ Lost Lagoon background. I used the Sunny Day DSP for the next layer, the diagonal banner (2 1/2″ x 4″) and hand-trimmed the ends of the banner by cutting down 1/2″ from the center of each end, and then cutting down to that point from each corner.
The next layer is a Pool Party rectangle (3 1/4″ x 2 3/4″) stamped with a custom background. I wanted to use this technique to reduce the amount of DSP I’d need, so I picked the Happy Little Labels stamp set for its outlined and filled-in stars. I stamped these randomly across the layer in Pool Party ink before adhering it so that I could stamp off the edges a few times.
Finally, I popped up the sentiment banner in Basic White (3/4″ x 2 1/8″) with “hello” stamped from the Happy Labels stamp set. (These are two different stamp sets with very similar names.) I used a punch to cut the end of the smaller banner, but the sketch doesn’t call for that, so feel free to hand trim or skip it!
Thank You
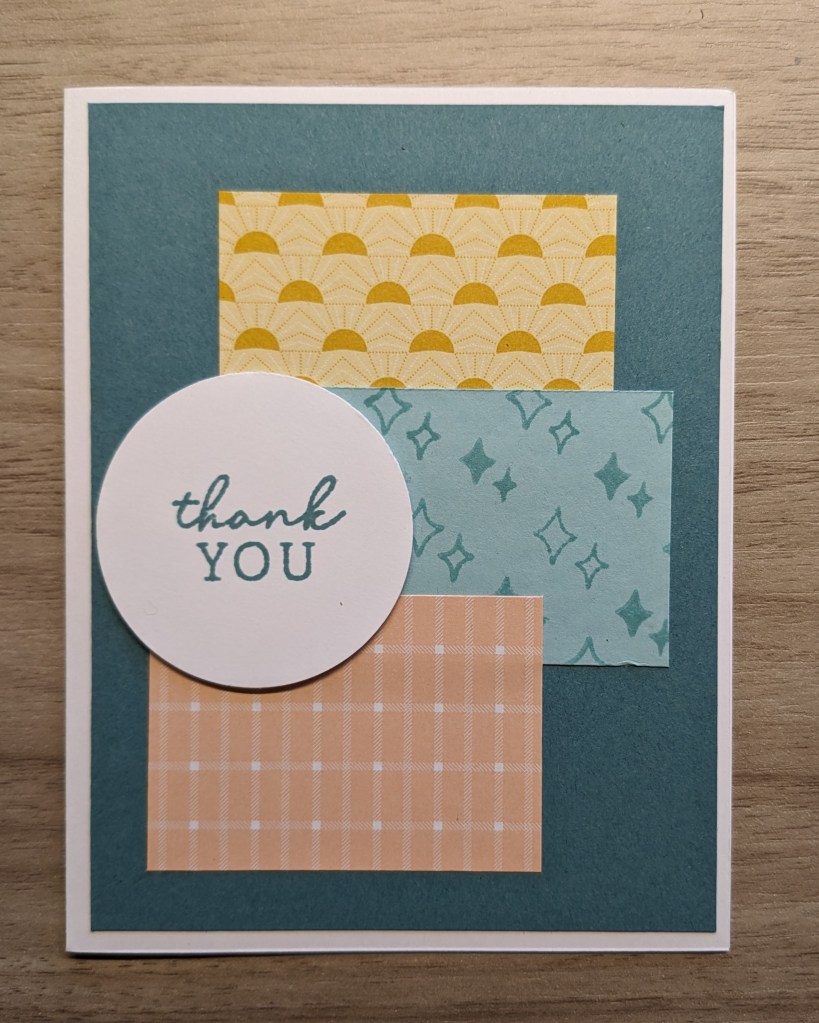
I used another punch for the circle in this one (2″) and popped it on top of the middle layers: two DSP rectangles and another one with my custom background (all 2 1/2″ x 1 3/4″). The DSP and sentiment come from the Sunny Days and Happy Labels sets and I stamped “thank you” in Lost Lagoon to match the 4″ x 5 1/4″ background.
Celebrate

I’m not a huge fan of hand trimming banners, so I took the next sketch in a different direction: I popped a tag on top of another DSP pattern (4″ x 5 1/4″) from the Sunny Days set. I used a corner punch to cut the tag shape (2 1/4″ x 4″), then I used the same punch to cut the rectangular hole in the tag and ran some white ribbon through it.
The tag reminded me of a present, so I decided to make this my birthday card in the cohesive set I committed to make. Since I’d already used two stamp sets, I decided not to stray for the sake of a literal birthday sentiment. Instead, I repeated each half of the filled-in “celebrate” stamp from Happy Little Labels three times on the Basic White layer (2″ x 3″), stamping off the edge before adhering the sentiment to the tag.
Just a Note

This kind of card scares me a little bit because I don’t always cut the straightest and my placement is even less reliable. Nevertheless, I forged on and created a more spaced-out design to give myself a little grace. If I were to make this card again, I would balance the inner and outer borders a little better.
The background is Lost Lagoon (4″ x 5 1/4″) and the sentiment is Basic White (3″ x 3/4″ with punched ends). The DSP rectangles are all 1 1/8″ x 1 5/8″. I tried making those a little bigger, but the spacing didn’t quite work out. Since I’d already cut two sheets of DSP (four patterns total), I placed two of each pattern opposite each other across the grid. Then I used a stamped Pool Party tile for the final spot in the middle. Pro tip: Stamp all of these Pool Party layers at the same time. I cut them first, but you could start with a 5 3/4″ x 2 3/4″ piece, stamp it, and then cut it. Up to you!
What’s Next
I liked sticking to a common set of colors, stamps, and papers this time around. Looking ahead, I think I might start experimenting with bigger variations or more complex designs…we’ll see. Regardless, look forward to the next four sketches in a future post.
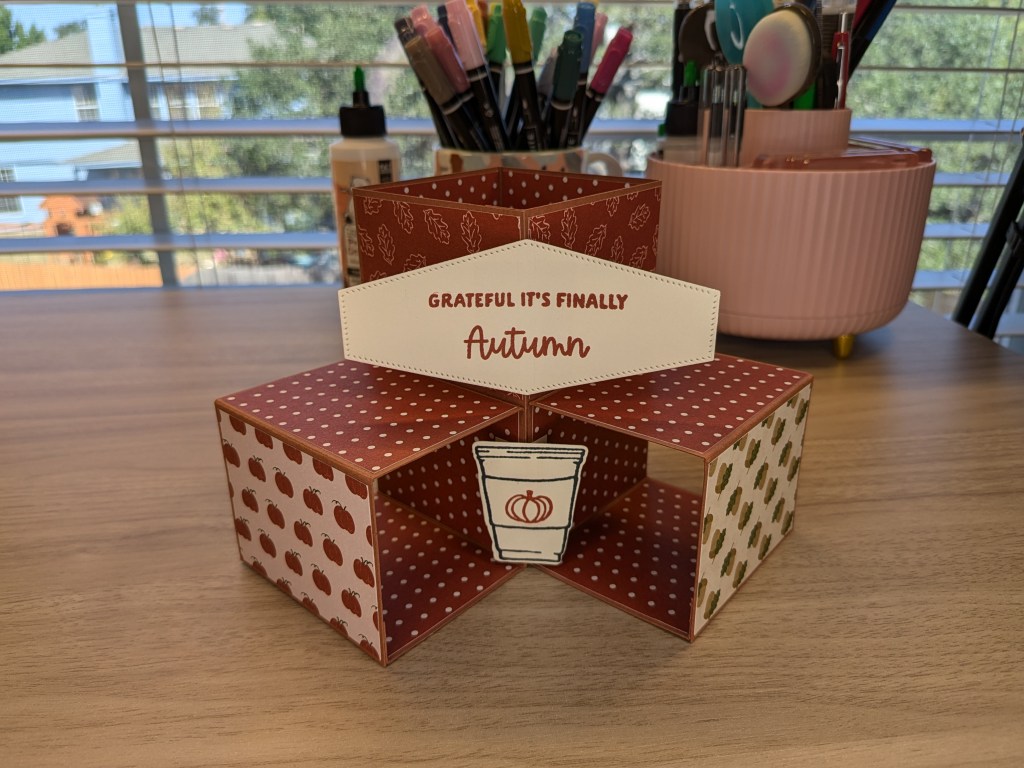
By the way, if you want to preserve your cards as a set, check out my Country Lace Card Set post for instructions to make a coordinating card box!
Measurements and Supplies
Whether you read my narrative instructions or jumped here from the intro, you’re in the right place! Here’s a quick reference of measurements for all four cards.
The Cards
Hello
- Card base: Basic White thick cardstock, 8 1/2″ x 5 1/2″, scored at 4 1/4″
- Layer 1: Lost Lagoon card stock, 4″ x 5 1/4″
- Layer 2: Sunny Days DSP, 2 1/2″ x 4″
- Layer 3 (stamped in Pool Party): Pool Party card stock, 3 1/4″ x 2 3/4″
- Sentiment layer: Basic White card stock, 2″ x 3/4″
Thank You
- Card base: Basic White thick cardstock, 8 1/2″ x 5 1/2″, scored at 4 1/4″
- Layer 1: Lost Lagoon card stock, 4″ x 5 1/4″
- Layer 2: Sunny Days DSP (x3), 2 1/2″ x 1 3/4″
- Sentiment layer: Basic White card stock, 2″ circle, trimmed to shape by hand or cut with a punch
Celebrate
- Card base: Basic White thick cardstock, 8 1/2″ x 5 1/2″, scored at 4 1/4″
- Layer 1: Sunny Days DSP, 4″ x 5 1/4″
- Layer 2 (cut as tag): Lost Lagoon card stock, 2 1/4″ x 4″
- Sentiment layer: Basic White card stock, 2″ x 3″
Just a Note
- Card base: Basic White thick cardstock, 8 1/2″ x 5 1/2″, scored at 4 1/4″
- Layer 1: Lost Lagoon card stock, 4″ x 5 1/4″
- Layer 2 (x9): Sunny Days DSP, 1 1/8″ x 1 5/8″ (I stamped one Pool Party rectangle instead of introducing a fifth DSP pattern)
- Sentiment layer: Basic White card stock, 2 3/4″ x 3/4″
Thanks for making these with me. Check back again for more tutorials on Handmade by Lily McKay.


Leave a comment