
I hope you enjoyed my previous posts (1, 2, 3). Now, let’s try the next four sketches! You can find these sketches on page 22 of the Stampin’ Up! 2024-2025 Annual Catalog and follow along below.
Materials Used
I used my favorite suites and bundles for these four cards. Coordinating colors are listed on the pages shown below in the 2024-2025 Annual Catalog.
- Sending Love and Best Wishes*: 2024-2025 In Color DSP (pg. 139)
- Bursting With Happiness: To Market (pgs. 38-39)
- Happy Birthday: Lily Pond Lane (pgs. 44-45)
- Hello: Mediterranean Blooms (pgs. 34-35)
*The sentiments for this card come from the Perennial Postage stamp set. You can use any set you like here as the DSP does not have coordinating stamps.
Detailed Instructions
Here are all the steps I took making these four sketches.
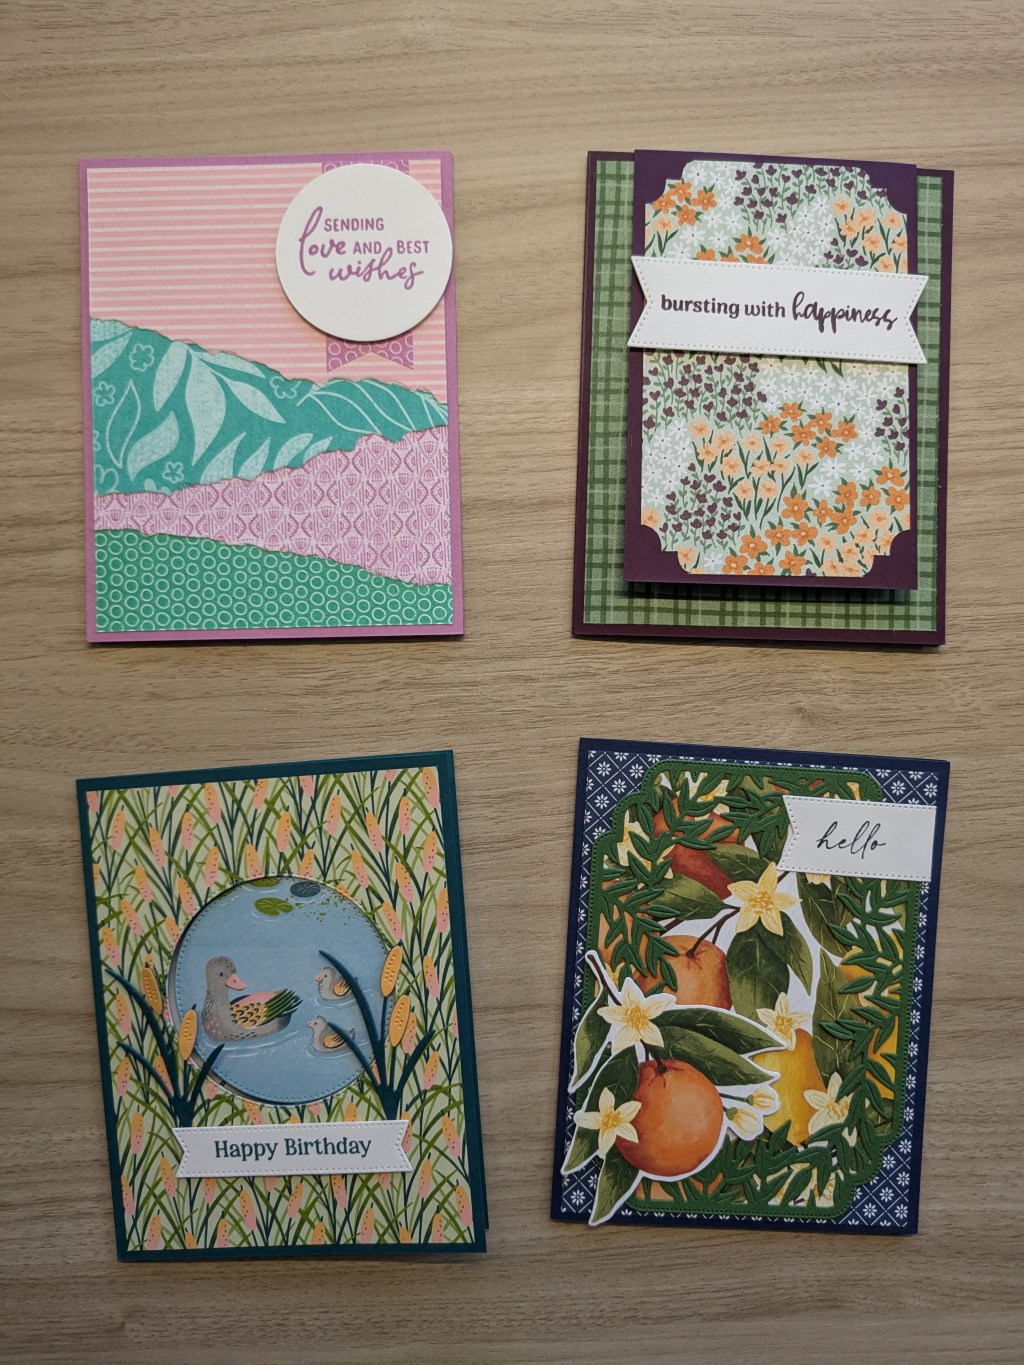
Sending Love and Best Wishes
Measurements
- Card base: Petunia Pop cardstock, 8 1/2″ x 5 1/2″, scored at 4 1/4″
- Layer 1: Shy Shamrock DSP, 4″ x 5 1/4″
- Layer 2: Petunia Pop DSP, 4″ x 4 3/4″, torn across short side
- Layer 3: Summer Splash DSP, 4″ x 3 3/4″, torn across short side
- Layer 4: Pretty in Pink DSP, 4″ x 2 3/4″, torn across short side
- Banner: Petunia Pop DSP, 1″ x 2 3/8″, trimmed to banner shape
- Sentiment layer: Basic White card stock, 2″ punch
Instructions
I love this torn paper technique and I love the 2024-2025 In Color DSP even more! I used the torn paper technique in my Country Lace Card Set, and the trick is to keep your fingers close together and tear toward yourself to expose a torn white edge on the piece you’re holding steady. In this case, I tore my paper upside down to give cleaner edges.
I punched out the sentiment in Basic White with a 2″ decorative punch and trimmed the banner behind it using another neat trick. If you don’t have a banner punch, just cut up from the middle of your banner about 1/4″ and then cut from each corner up to that first cut. This should create an even banner shape. The sentiment is in Petunia Pop, stamped from the Perennial Postage set.
On the inside, I adhered a scrap of torn Pretty in Pink DSP to the bottom of a Basic White card insert (4″ x 5 1/4″) and stamped “Big Hugs” from the Perennial Postage stamp set in Petunia Pop.
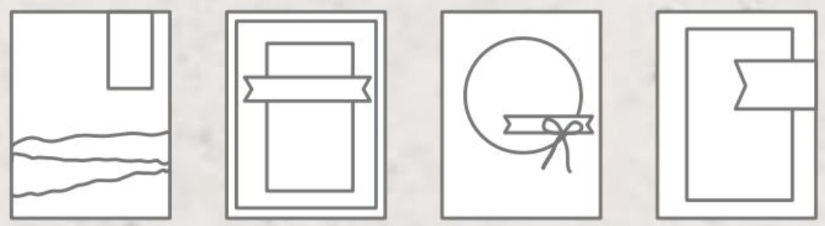
Bursting With Happiness
Measurements
- Card base: Blackberry Bliss cardstock, 8 1/2″ x 5 1/2″, scored at 4 1/4″
- Flap (same as card base): 3 1/4″ x 5 1/2″, scored at 1/2″
- Layer 1: To Market DSP (mixed flowers), 3″ x 4 3/4″, punched with corner punch
- Layer 1 sentiment: Basic White cardstock, die cut
- Layer 2: To Market DSP (green tartan), 4″ x 5 1/4″
- Layer 2 sentiment: Basic White cardstock, 2 1/2″ x 4 1/4″
- Interior Layer: Basic White cardstock, 4″ x 5 1/4″
Instructions
I used a tutorial for this one. It doesn’t match the sketch exactly, but it’s one of my favorite fun folds, and I thought it fit well enough. You can find the tutorial here: https://sunnydaystamping.com/double-open-fun-fold/. h/t Juli Baca of Sunny Day Stamping.
The one modification I made was to add a torn piece of Blackberry Bliss to the first interior sentiment layer. It’s about 2 1/2″ x 2 3/4″, torn using the technique shared above. I placed a bunch of flowers from the To Market DSP on top of this to go with the “Thanks a Bunch” sentiment. On the inside, I simply used the border stamp from the Market Goodness set twice: one on top, one on bottom.


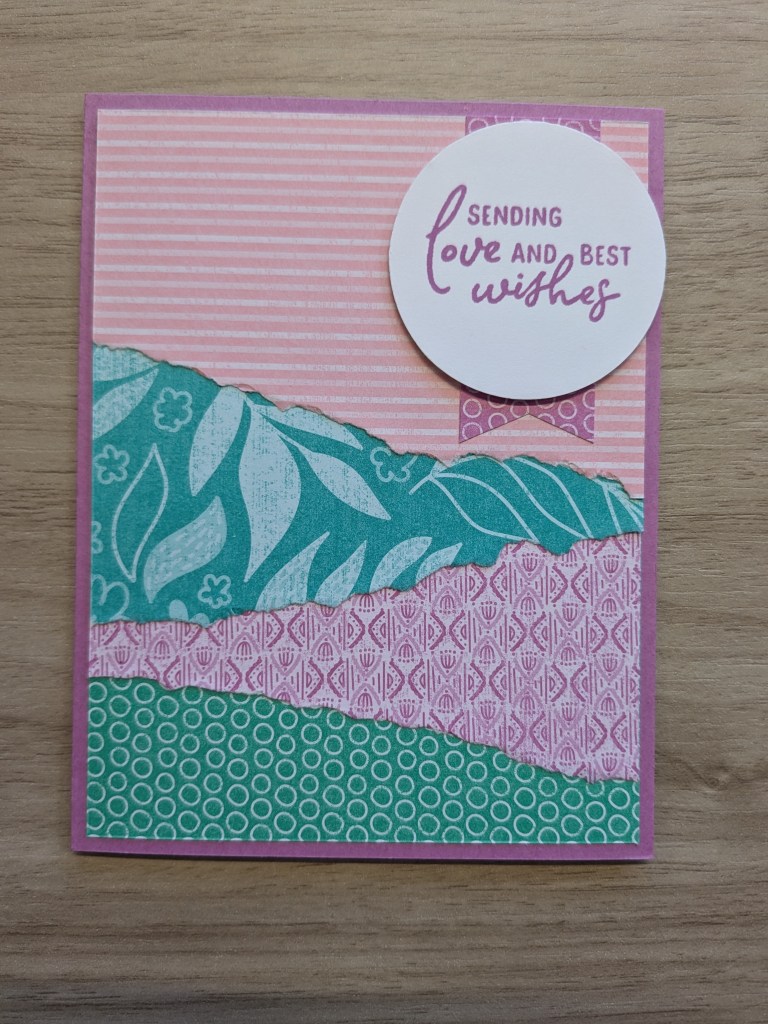
Happy Birthday
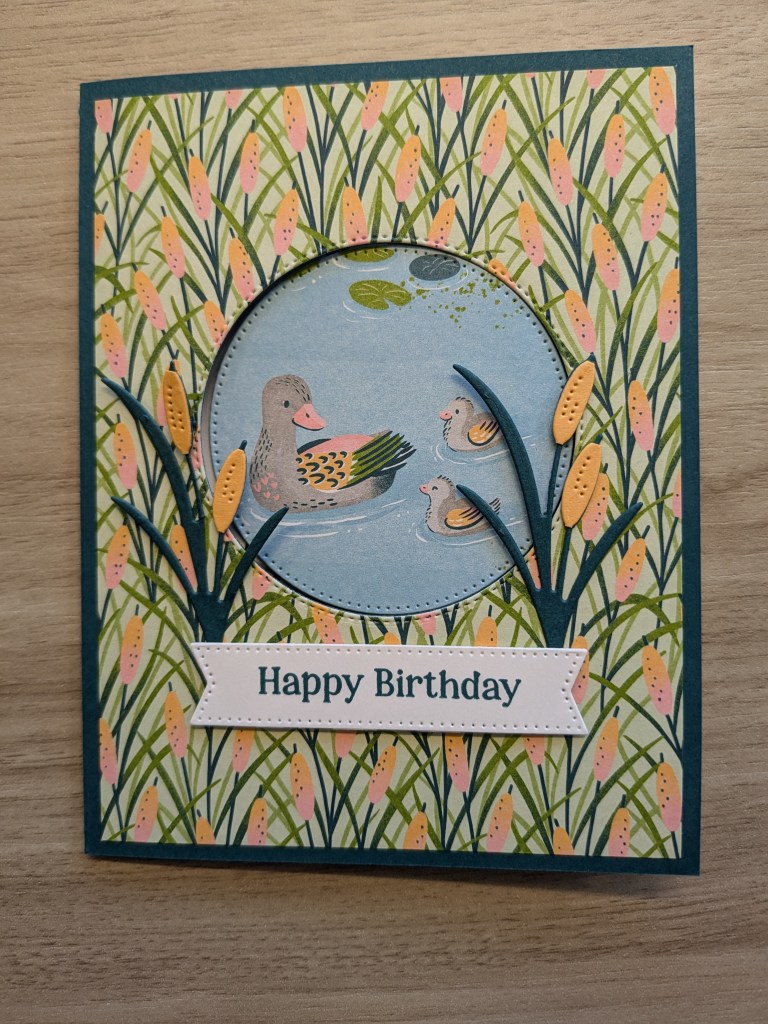
Materials
- Card base: Pretty Peacock cardstock, 8 1/2″ x 5 1/2″, scored at 4 1/4″
- Interior card base: Basic White cardstock, 8″ x 5 1/4″, scored at 4″ and 6″
- Layer 1: Lily Pond Lane DSP (cattails), 4″ x 5 1/4″
- Sentiment layer: Basic White card stock, die cut
- Layer 2 (interior): Lily Pond Lane DSP (light lilypads) 1 5/8″ x 5″
- Scrap: Pretty Peacock and Peach Pie cardstock; Lily Pond Lane DSP (pond with swimming ducks), die cut
Instructions
This is another favorite fun fold of mine. I’ve made this several times from multiple tutorials, so now I’ve gotten to the point I can make it all on my own. The beauty of it is that the interior layer extends past the card base and folds in to hold the circle that shows through the hole in the card front.

The trick to making this one is simple: Use the same die (or punch) to 1. cut the hold in the front of the card and 2. cut out the circle to nest in it. For added support, adhere the scrap of cardstock from your card front to the back of the DSP circle.
One other trick: To make the two-toned cattails on the front of my card, I just die cut the shapes twice – once in Pretty Peacock and once in Peach Pie. Then I cut just the parts I needed from the Peach Pie set and adhered them to the same place on the Pretty Peacock set. Pretty peachy!
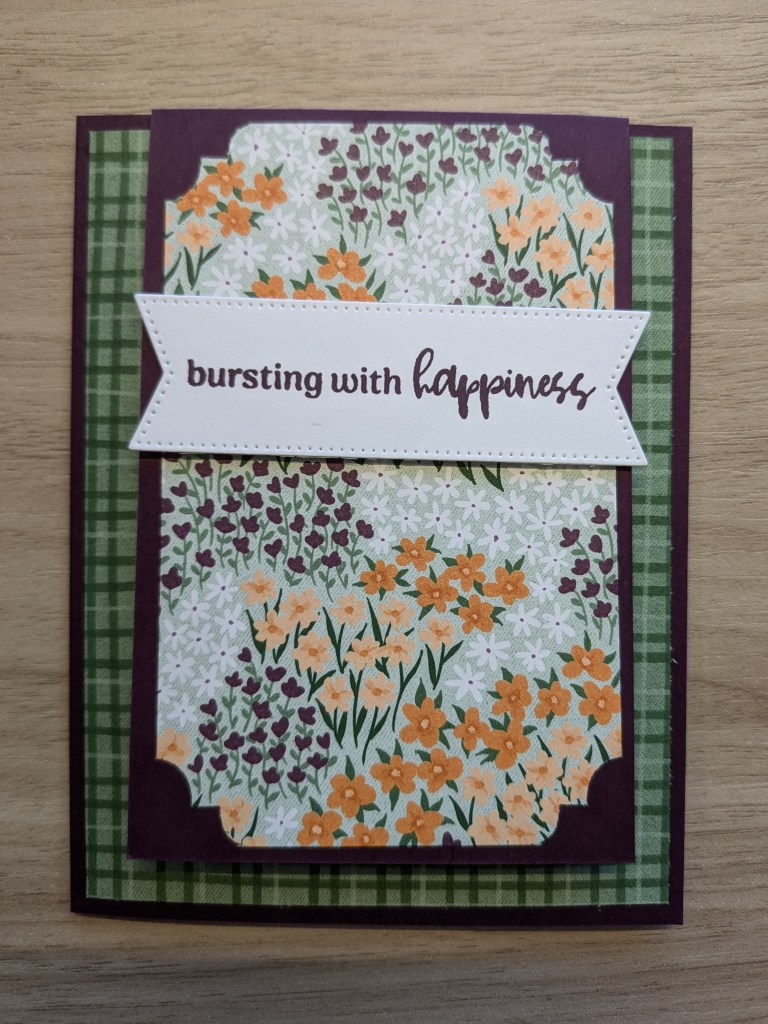
Hello

Materials
- Card base: Night of Navy cardstock, 8 1/2″ x 5 1/2″, scored at 4 1/4″
- Layer 1: Mediterranean Blooms DSP (small blue tiles), 4″ x 5 1/4″
- Layer 2: Mediterranean Blooms DSP (oranges and lemons), 4″ x 5 1/4″, die cut (see instructions)
- Layer 3: Garden Green cardstock, 4″ x 5 1/4″, die cut (see instructions)
- Sentiment layer: Basic White card stock, die cut and trimmed
Instructions
My wife and I love this set for its maximalism, so I wanted to highlight that here. I love the oranges in this set, so the coordinating dies come out a lot. The best part: the same dies cut out both the stamped oranges and DSP ones. I also love the nested dies for the frame in this card. Let’s see now that works:
- Place BOTH the rounded border and biggest leaf frame dies on top of your Garden Green piece. Nest these together just like they nest for storage.
- Cut the frame and set it aside.
- Place JUST the rounded border die on top of your orange-and-lemon DSP piece. This will only make the exterior cut.
- Cut the background and lay the frame on top of it. If it lines up perfectly, the embossed dots on one layer will nest into the debossed dots of the other.
- Adhere the two pieces and then adhere that to Layer 1.
As for the rest of the front, I die cut a single orange from the Mediterranean Blooms DSP and popped it up with Dimensionals. To create the banner, I die cut a full banner with an offset sentiment, cut off the tail, and adhered it on top of all three layers, lined up with Layer 1.
Finally, on the inside, I stamped “Just Checking In” in Night of Navy and an orange in the bottom corner. I colored the orange using Garden Green and Peach Pie Stampin’ Write markers.
What’s Next
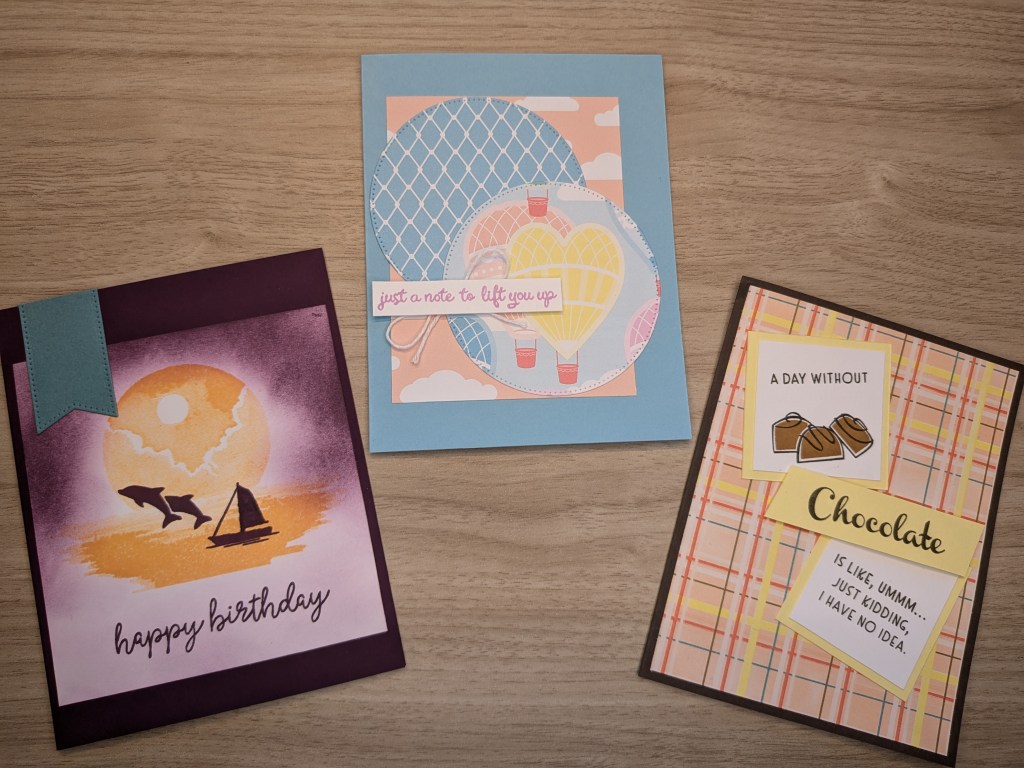
I have two more posts in this series. Stay tuned for coffee (and more coffee), hot air balloons, beach vibes, and more as I finish out the sketches from the 2024-2025 Stampin’ Up Annual Catalog.
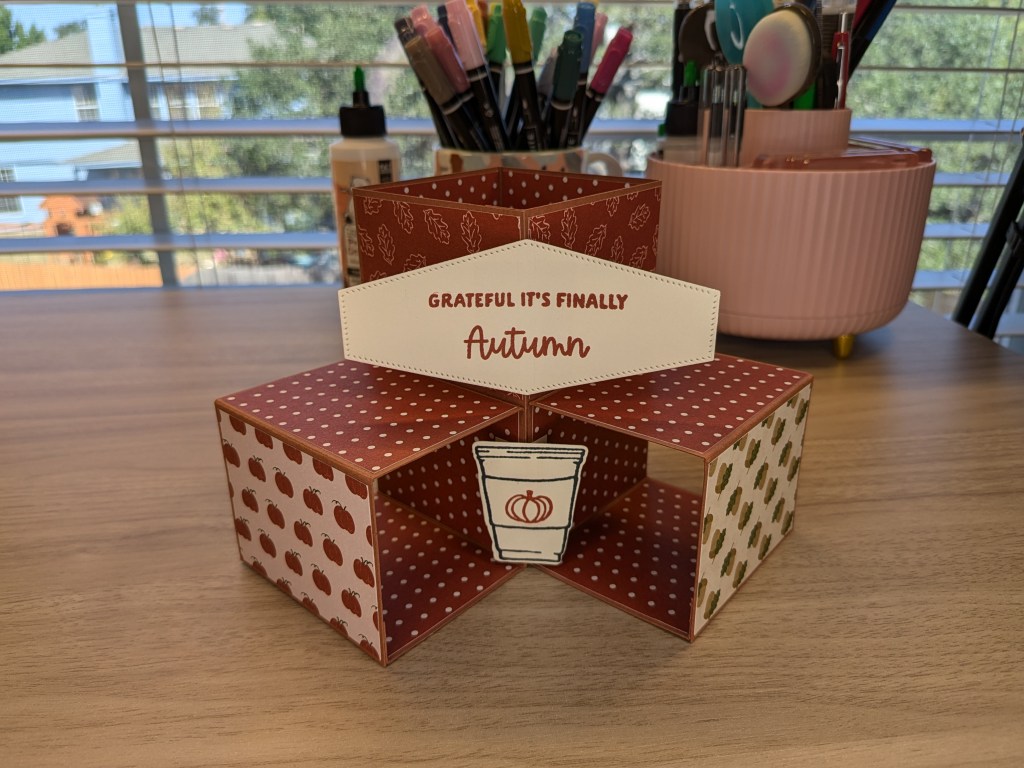
By the way, if you want to preserve the cards in this post or others as a gift set, check out my Country Lace Card Set post for instructions to make a coordinating card box!
Thanks for stopping by. See you next time!


Leave a comment